How to Install Air Conditioning: Step-by-Step UK Guide
A comprehensive guide to UK domestic air conditioning installation, covering F-Gas regulations, Part P electrical safety, 2026 pricing, and step-by-step technical procedures.
The pursuit of a temperate indoor climate in the United Kingdom has shifted from a luxury to a necessity. As summer heatwaves become more frequent and extreme, British homeowners are increasingly looking for professional advice on how to install air conditioning to ensure their living spaces remain habitable during the hottest months. Unlike many DIY home improvements, the installation of a split-system air conditioning unit is a complex procedure governed by strict environmental and electrical regulations. In the UK, this process is not merely about physical mounting but involves handling fluorinated greenhouse gases (F-gases) and high-voltage electrical circuits, both of which require specific certifications.
Understanding how to install air conditioning requires a clear grasp of the technical requirements, the legal framework, and the financial investment involved. From calculating the correct British Thermal Unit (BTU) rating for a Victorian terrace bedroom to ensuring the outdoor condenser unit is placed according to Permitted Development rights, every step demands precision. This guide provides a detailed roadmap for UK residents, outlining the 2026 cost expectations, the role of F-Gas certified engineers under Regulation (EC) 517/2014, and the practical steps taken during a professional installation. By the end of this article, you will have a thorough understanding of the timeline, costs, and safety standards necessary to achieve a high-performance cooling and heating solution for your home.
- F-Gas certification is a legal requirement for connecting and commissioning any split-system air conditioner in the UK.
- A 2.5kW unit is standard for UK bedrooms, while 3.5kW or 5kW is better for larger living areas.
- Expect to pay between £1,400 and £2,700 for a professional single-split installation including hardware and labour.
- Part P electrical safety compliance is essential for ensuring home insurance validity and safe operation of the system.
- Annual maintenance is required to keep manufacturer warranties valid and maintain high energy efficiency levels.
- Planning permission is rarely needed for standard houses but is vital for listed buildings and flats.
- Modern air conditioners double as highly efficient heat pumps, offering cost-effective warmth during British winters.
Understanding UK Regulations: F-Gas and Part P Compliance
Before delving into the physical work, it is vital to understand the legal landscape of UK air conditioning. The most significant piece of legislation is the F-Gas Regulation (EC) 517/2014, which remains UK law post-Brexit. This regulation dictates that any system containing fluorinated greenhouse gases—such as R32 or R410A—must be installed, maintained, and decommissioned by a technician holding a valid F-Gas certificate. It is illegal for an uncertified homeowner to connect the refrigerant pipework themselves. Even 'pre-charged' systems sold to the public require a certified professional to commission the unit to ensure no leaks occur, as these gases have a global warming potential thousands of times greater than CO2.
In addition to environmental laws, the electrical side of the installation must comply with Building Regulations Part P (Electrical Safety). Most fixed air conditioning systems require a dedicated circuit back to the consumer unit, especially for larger multi-split systems exceeding 5kW. This work must be carried out by a competent person, often registered with NICEIC or NAPIT, who can certify that the wiring meets BS 7671 standards. Failure to adhere to Part P can invalidate your home insurance and cause issues when you eventually sell the property, as you will lack the necessary completion certificates.
Furthermore, homeowners must consider local planning laws. In most cases, installing a single outdoor condenser unit falls under 'Permitted Development,' provided it is not oversized and is placed at least one metre from the property boundary. However, if you live in a listed building or a Conservation Area, you must consult your local planning authority. Noise levels are also a factor; modern units from brands like Daikin or Mitsubishi Electric are designed to operate under 50dB, but poor placement near a neighbour’s bedroom window can still lead to statutory nuisance complaints under the Environmental Protection Act 1990.
Sizing Your System: The Importance of kW and BTU Ratings
One of the most common mistakes in UK installations is choosing a unit that is incorrectly sized for the room. Cooling capacity is measured in kilowatts (kW) or British Thermal Units (BTUs), where 1kW is approximately equal to 3,412 BTUs. A standard UK bedroom of roughly 12 to 15 square metres typically requires a 2.5kW (9,000 BTU) unit. Larger open-plan living areas or south-facing rooms with significant glazing—such as modern conservatories—may require a 3.5kW (12,000 BTU) or even a 5.0kW (18,000 BTU) system to maintain a comfortable 18-21°C during a heatwave.
To calculate the required capacity, an installer will perform a 'heat load calculation.' This goes beyond simple floor area; it considers the orientation of the room, the quality of loft and cavity wall insulation, the type of glazing (single vs. double or triple), and the number of occupants and electronic devices. For instance, a small home office with multiple monitors and a server will have a much higher heat load than a guest bedroom of the same size. Systems from Samsung and LG offer inverter technology, which allows the compressor to modulate its speed; this means an oversized unit can run at lower power, but an undersized unit will run at 100% capacity indefinitely, leading to premature wear and inflated electricity bills.
In 2026, we also focus heavily on the Seasonal Energy Efficiency Ratio (SEER) and Seasonal Coefficient of Performance (SCOP). For a system to be cost-effective in the UK climate—where we use cooling for perhaps 60 days a year but might use the unit for supplementary heating in winter—you should aim for a SEER of at least 6.1 (A++ rating). This ensures that for every 1kW of electricity consumed, the unit delivers over 6kW of cooling. High-end models from Panasonic can even exceed a SEER of 8.5, making them incredibly cheap to run, often costing less than £0.15 per hour at current 2025/2026 energy price caps.
Typical Installation Costs for 2026
Budgeting for an air conditioning installation in the UK requires a distinction between the hardware cost and the professional labour and materials fee. For a high-quality single-split system (one indoor unit and one outdoor unit) from a reputable brand like Mitsubishi Electric, expect the hardware to cost between £600 and £1,200 depending on the kW rating. The professional installation service, including F-Gas commissioning, vacuuming the lines, and electrical certification, typically ranges from £800 to £1,500. Therefore, the total starting price for a professional bedroom installation in 2026 is usually between £1,400 and £2,700.
Multi-split systems, which allow up to five indoor units to be connected to a single outdoor condenser, offer a more aesthetic solution for whole-house cooling but come at a premium. A 'dual-split' (two rooms) will typically range from £3,200 to £4,500, while a four-room system can easily exceed £7,500. The complexity of the pipe runs significantly impacts the price. A 'back-to-back' installation, where the indoor unit is mounted on the same wall as the outdoor unit, is the cheapest. If the engineer needs to run refrigerant lines through floor voids, up into the loft, or use a condensate pump to move waste water uphill, labour costs will increase by £300 to £600 per unit.
Maintenance is a secondary cost to consider. To keep your 5-to-10-year manufacturer warranty valid, you must have the system serviced annually by an F-Gas registered engineer. In 2026, the standard rate for a single-split service is between £120 and £180. This service involves cleaning the evaporator coils, checking refrigerant pressures, testing for leaks, and ensuring the drainage line is clear of biological growth. While it may seem like an extra expense, a well-maintained system uses 15% less energy than a neglected one, saving you money on your monthly utility bills.
Step-by-Step Installation: The Indoor Unit
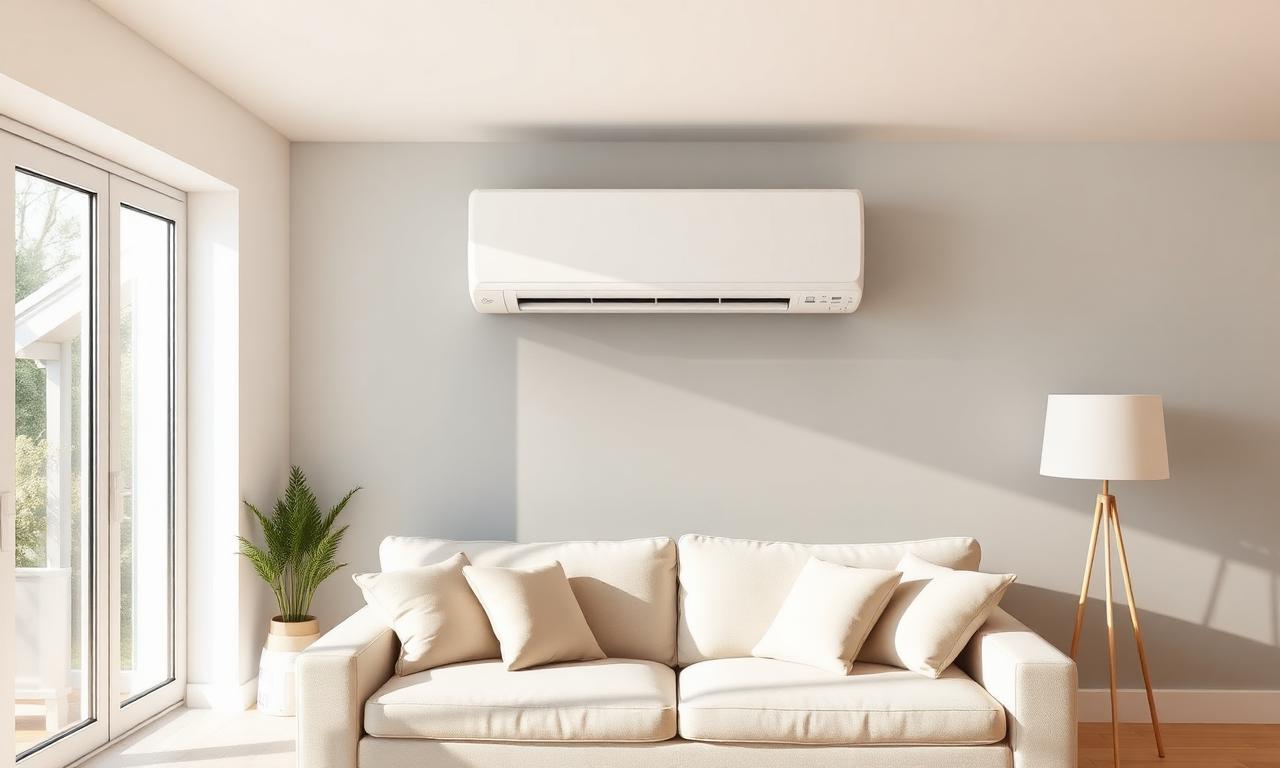
The physical installation begins with the indoor unit (the evaporator). The engineer first identifies the optimal position on the wall, usually near the ceiling to allow for the best air distribution, as cool air sinks. A mounting plate is secured to the wall using heavy-duty fixings. It is crucial that the plate is perfectly level; if the unit is tilted, the condensate water—which is pulled out of the humid air during the cooling process—will not flow into the drain tray correctly, leading to leaks down your wallpaper. A hole, typically 65mm or 75mm in diameter, is then core-drilled through the external wall at a slight downward angle to allow for drainage and the passage of copper pipes.
Once the plate is secure, the engineer prepares the 'umbilical cord' of the unit. This consists of two copper pipes (a liquid line and a gas line) wrapped in thermal insulation, a data cable that allows the indoor and outdoor units to communicate, and a plastic condensate drain hose. These are carefully fed through the drilled hole. In a professional UK installation, these pipes are not left bare on the exterior; they are encased in UV-resistant PVC trunking, often referred to as 'Inoac' or 'Big Foot' trunking, which can be colour-matched to your brickwork or rendering.
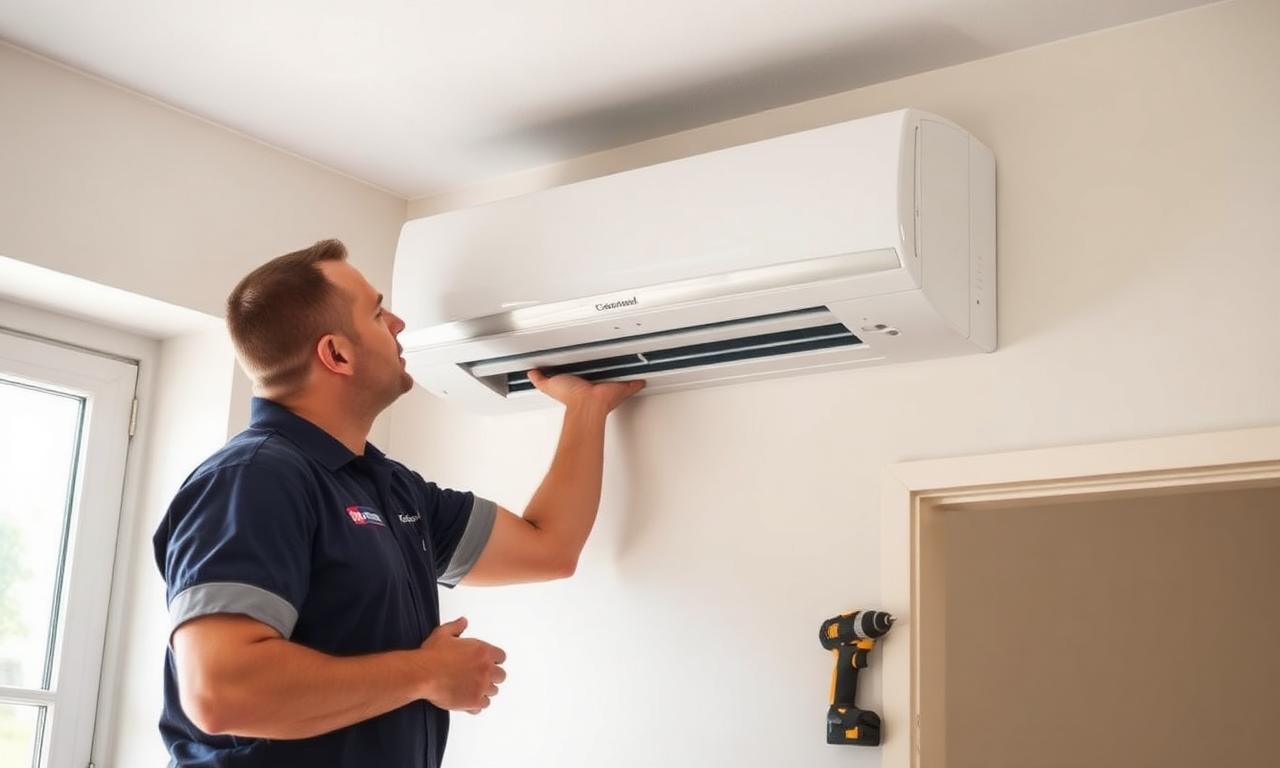
The final part of the indoor setup involves flare connections. The copper pipes must be cut precisely and 'flared' using a specialist tool to create a cone shape that fits perfectly onto the unit’s brass connections. Applying the correct amount of torque is essential; too loose and the refrigerant will leak over time; too tight and the copper flare will crack. High-quality brands like Daikin specify exact Newton-metre (Nm) settings for these joints. Once the indoor unit is clicked into place on the mounting plate, the engineer moves outside to begin the more arduous task of installing the condenser.
The Outdoor Condenser and Refrigerant Management
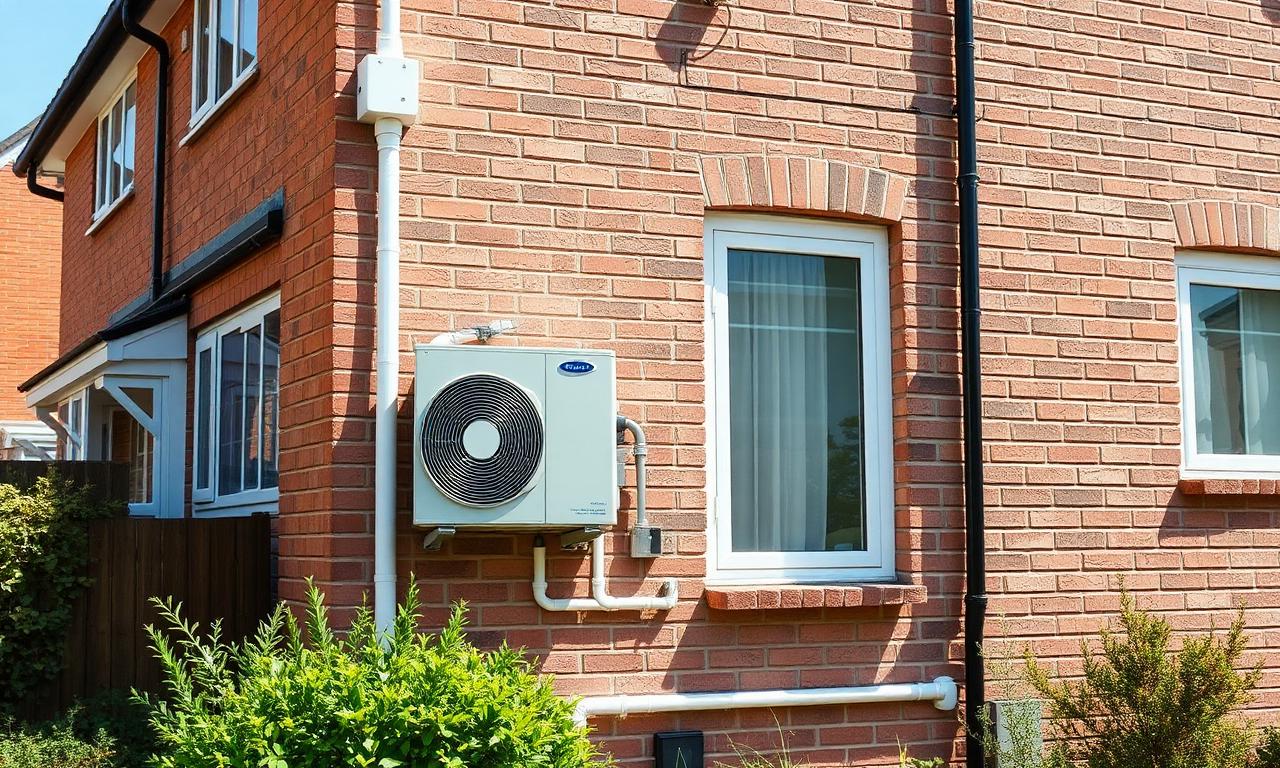
The outdoor unit, or condenser, is the workhorse of the system. In the UK, these are usually mounted on the ground on 'rubber feet' (which absorb vibration) or on wall-mounted steel brackets. If wall-mounting, the engineer must ensure the masonry can support the weight, which can range from 25kg to over 70kg for larger units. The condenser requires at least 100mm of clearance from the wall and up to 500mm of clear space in front of the fan to ensure adequate airflow. If the unit cannot 'breathe,' it will overheat and its efficiency will plummet, leading to high running costs and potential compressor failure.
Once the copper pipework is connected to the outdoor unit, the engineer performs a 'pressure test.' This involves pressurising the entire system with dry nitrogen to around 40 bar (approx. 580 psi) and leaving it for at least 30 minutes. If the pressure drops, there is a leak that must be found and fixed. This is a critical safety step that DIY enthusiasts cannot perform, as it requires high-pressure nitrogen cylinders and specialized regulators. Following a successful pressure test, the system is subjected to a 'vacuum pull.' Using a vacuum pump, the engineer removes all air and moisture from the pipes. Any moisture left in the system can freeze inside the expansion valve or turn acidic when mixed with refrigerant oil, destroying the compressor within months.
Finally, the refrigerant is released. Most modern units come 'pre-charged' for a pipe run of up to 5 or 7 metres. If your installation requires a longer run—for example, if the condenser is at the back of the garden—the engineer must calculate the additional 'top-up' charge required, usually measured in grams per extra metre. This is done using precision scales. Once the valves are opened, the system is 'live,' and the engineer will run the unit in both cooling and heating modes, checking the 'Delta T' (the temperature difference between the air entering and leaving the unit) to ensure it is operating within the manufacturer's specified range.
Electrical Integration and Part P Safety
As previously noted, the electrical work is a secondary but equally vital part of how to install air conditioning. A standard 2.5kW unit might pull around 3 to 5 Amps during normal operation, but its start-up current (inrush current) can be higher. While some smaller units can technically be spurred off an existing ring main, best practice in the UK is to provide a dedicated radial circuit from the consumer unit. This circuit should be protected by a Type C or Type D circuit breaker, which is designed to handle the brief surge in current when the compressor starts without tripping the power.
An external isolator switch is a legal requirement. This is a weatherproof, lockable switch mounted near the outdoor unit that allows an engineer to safely cut the power for maintenance without entering the house. The cabling used must be appropriately rated; usually, 2.5mm² 3-core SWA (Steel Wired Armour) cable is used for the run between the consumer unit and the outdoor isolator to protect against accidental damage from gardening tools or rodents. The interconnecting cable between the indoor and outdoor units is typically a 4-core 1.5mm² SY cable or similar, carrying both power and the communication signal that allows the two units to 'talk' to each other.
Following the installation, the electrician or F-Gas engineer must provide a Minor Electrical Works Certificate. This document proves that the work was tested for earth continuity, insulation resistance, and polarity. It is your proof of compliance with Part P of the Building Regulations. In 2026, with the move toward 'smart homes,' many installers will also assist in setting up the Wi-Fi interface. Brands like Panasonic (Comfort Cloud) and Daikin (Onecta) allow the homeowner to control the system via a smartphone app. Integrating this correctly with the home network is the final step in a modern installation, ensuring the homeowner can pre-cool their lounge before returning home from work.
Longevity: Common Pitfalls and Maintenance
Even the best hardware from LG or Samsung will fail prematurely if the installation was flawed. One of the most common pitfalls is the 'kinking' of the copper pipes. Copper becomes work-hardened as it is bent; if an engineer tries to make a sharp 90-degree turn without a proper pipe bender, the interior diameter of the pipe can collapse. This restricts the flow of refrigerant, causing the compressor to work harder and eventually burn out. Another common error is the improper management of the condensate drain. If the drain hose is not angled correctly, or if it is 'trapped' with a loop of water, the indoor unit will overflow, potentially damaging electronics, furniture, or flooring.
Homeowners also often neglect the air filters. In a domestic UK environment, the filters inside the indoor unit should be vacuumed every 2 to 4 weeks during periods of heavy use. These filters trap dust, pollen, and pet dander. If they become clogged, the airflow is restricted, forcing the fan motor to work harder and reducing the unit's ability to cool the air. Most modern units feature a 'filter clean' indicator light, but manual checks are always recommended. Beyond the filters, the outdoor unit needs to be kept clear of autumn leaves, spider webs, and overgrown garden foliage. If the delicate aluminium fins on the condenser are crushed or blocked, the heat exchange process is hampered.
Finally, the myth that air conditioning 'uses up' gas must be debunked. A correctly installed system is a hermetically sealed loop. If the unit requires a 're-gas,' it means there is a leak that must be identified and repaired before any more gas is added. Under the F-Gas regulations, an engineer is forbidden from simply topping up a leaking system. They must find the leak, fix it (often by re-flaring a joint or brazing a hole), and then re-test the system. By choosing a reputable installer who provides a multi-year labour guarantee alongside the manufacturer's 5-year parts warranty, you protect yourself against these long-term maintenance headaches.
Choosing the Right Installer in the UK
Selecting the right professional is the single most important decision in the process. You should always look for a company that is Refcom or Quidos registered. These are the primary bodies in the UK that verify an installer's F-Gas certification. You can check a company's credentials on the official Refcom website by searching for their registration number. Furthermore, check if they are an 'Approved Installer' for the specific brand you want, such as a Daikin Cloud Partner or a Mitsubishi Electric Business Solutions Partner. This often allows the installer to offer extended warranties of up to 7 or 10 years, rather than the standard 3 or 5 years.
Request a written quote that includes a full breakdown of costs. A reputable quote should specify the model number of the units, the length of the pipe runs, any electrical work required, and the inclusion of VAT. In the UK, the VAT rate for air conditioning installation can be complex; while it was 5% for energy-saving materials in the past, standard domestic installations are generally taxed at 20% unless the primary use is for heating and meets specific 'Energy Saving Materials' criteria which are subject to changing HMRC guidance. Always clarify the final total including VAT up-front.
Finally, ask about their aftercare. Do they offer a 24-hour call-out service if the unit fails in the middle of a July heatwave? Do they provide a commissioning report? A professional will provide you with a 'Commissioning Sheet' which records the operating pressures and temperatures at the time of installation. This document is your 'birth certificate' for the system and is essential for any future warranty claims. By taking these steps, you ensure that your investment in home cooling is safe, legal, and built to last for the next 15 to 20 years.
Frequently asked questions
Can I install a split-system air conditioner myself in the UK?+
No, you cannot legally complete the installation yourself. While you can physically mount the units, UK law (F-Gas Regulation (EC) 517/2014) requires a certified professional to connect and commission the refrigerant lines. Additionally, electrical connections usually require Part P certification to comply with Building Regulations.
How much does it cost to run air conditioning per hour in the UK?+
With 2025/2026 energy prices, a modern 2.5kW unit (A++ rated) costs approximately £0.12 to £0.20 per hour of continuous use. Since the inverter modulates the power down once the room is cool, the actual cost is often lower than people expect, especially compared to electric heaters.
Do I need planning permission for air conditioning?+
In most UK homes, a single outdoor unit falls under 'Permitted Development.' However, you must follow specific rules: the unit must be less than 0.6 cubic metres in volume and at least one metre from the boundary. If you live in a flat, a listed building, or a Conservation Area, you must check with your local council first.
What is the best brand of air conditioning for a UK home?+
Daikin and Mitsubishi Electric are generally considered the 'gold standard' for reliability and quietness. Panasonic and Samsung offer excellent smart features and high SEER ratings. LG is often praised for its sleek design. All these brands are well-supported in the UK with available spare parts.
How long does a typical installation take?+
A standard 'back-to-back' installation for a single-split system usually takes 4 to 6 hours for a team of two engineers. A more complex multi-split system for three or four rooms can take two to three full days, depending on how difficult it is to hide the pipework.
Can air conditioning be used for heating in the winter?+
Yes, modern UK systems are 'air-to-air heat pumps.' They are incredibly efficient at heating, often delivering 3kW to 4kW of heat for every 1kW of electricity used. This makes them significantly cheaper to run than traditional electric plug-in heaters and a useful backup for your central heating.
Where should the outdoor unit be placed?+
It should be placed in a well-ventilated area, ideally on a north-facing wall or in the shade to improve efficiency. It must be accessible for future maintenance and should be mounted on vibration-absorbing feet to prevent noise from entering the house through the walls.