Wall-Mounted Air Conditioning Installation Guide UK
A comprehensive guide to wall-mounted AC installation in the UK, covering F-Gas regulations, pricing for 2026, and the practical steps involved in fitting a split system.
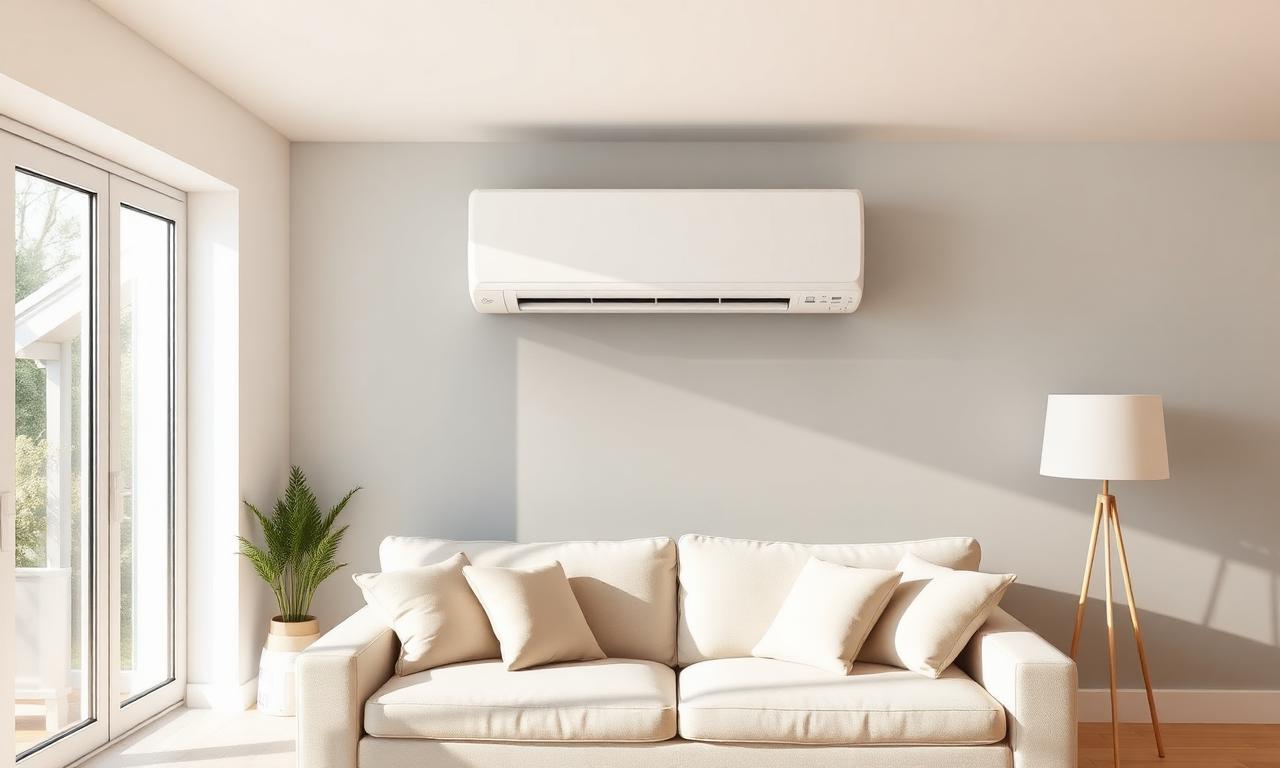
Installing a wall-mounted air conditioning unit is become a top priority for British homeowners as record-breaking summer temperatures become the new norm. While many home improvement tasks can be tackled as weekend DIY projects, understanding how to install a wall mounted air conditioning unit requires a deeper look into the strict legal frameworks and technical complexities unique to the UK. A wall-mounted split system consists of an indoor evaporator unit and an outdoor condenser, connected by refrigerant pipework and electrical cabling. This configuration provides the most efficient way to cool—and increasingly, to heat—residential spaces, but it is not a direct 'plug-and-play' appliance like a portable unit.
Navigating the installation process involves more than just drilling a hole in a wall; it requires careful thermal load calculations, adherence to BS 7671 electrical standards, and compliance with environmental laws. In the UK, the mishandling of fluorinated greenhouse gases (F-gases) is a criminal offence, meaning that while a homeowner can physically mount the units, the final commissioning must be performed by a certified professional. This guide will walk you through the essential stages of preparation, the costs you should anticipate in 2026, and the regulatory hurdles you must clear to ensure your system is efficient, safe, and legal. By the end of this article, you will have a complete understanding of the logistics and requirements for professional HVAC installation in a British domestic setting.
- UK law requires an F-Gas certified engineer to commission any split air conditioning system containing refrigerant.
- Expect to pay between £1,800 and £3,200 for a professional single-room installation in 2026.
- A 2.5kW unit is typically sufficient for UK bedrooms, while 3.5kW suits larger living areas.
- Part P electrical certification is required for new dedicated circuits to ensure home safety and legal compliance.
- Regularly cleaning the mesh filters every month can improve energy efficiency by up to 15%.
- Modern inverter units are extremely quiet and cost as little as 60p per night to run.
- Always verify an installer's Refcom or Quidos registration before agreeing to any AC installation work.
Understanding the UK Legal Framework: F-Gas and Part P
The most critical aspect of installing a wall-mounted air conditioning unit in the UK is compliance with statutory regulations. Under the F-Gas Regulation (EC) 517/2014, which remains part of UK law post-Brexit, it is illegal for anyone other than a qualified Category 1 F-Gas engineer to 'break' or 'make' the refrigerant circuit. This means that while you might be tempted by 'easy-install' kits found online, the final connection of the copper pipes and the release of gases like R32 or R410A must be handled by a certified professional. Doing it yourself without certification can lead to significant fines and will immediately void the manufacturer's warranty on units from major brands like Daikin or Mitsubishi Electric.
Beyond refrigerant handling, the electrical side of the installation is governed by Part P of the Building Regulations. Most fixed air conditioning systems require a dedicated circuit back to the consumer unit, especially for units exceeding 3.5kW (roughly 12,000 BTU). This work is considered 'notifiable' in England and Wales if it involves a new circuit or a consumer unit change in a special location like a kitchen or bathroom. A competent person, typically an NICEIC or NAPIT registered electrician, must certify that the installation complies with BS 7671 (the IET Wiring Regulations). Failure to provide a Building Regulations Compliance Certificate can cause significant delays and legal issues when you eventually try to sell your home.
Furthermore, if you live in a listed building or a conservation area, you may need to seek planning permission before installing an external condenser unit. While most domestic installations fall under 'Permitted Development' rights—provided the outdoor unit is under a certain size and located a specific distance from the property boundary—you must always check with your local planning authority. The noise levels of the outdoor unit, measured in decibels (dB), are also a factor; modern units from Panasonic or LG are exceptionally quiet, but their placement must not create a nuisance for neighbours. Expect an F-Gas engineer to charge between £450 and £800 just for the commissioning and certification phase if you have performed the physical mounting yourself, though many installers refuse to sign off on work they didn't complete from start to finish.
Calculating Power and Sizing for the British Home
Sizing a wall-mounted unit is not a matter of 'bigger is better.' An oversized unit will cycle on and off too frequently (short-cycling), leading to premature wear on the compressor and poor humidity control. Conversely, an undersized unit will run constantly, driving up electricity bills without ever reaching the desired temperature. In the UK, we typically measure cooling capacity in Kilowatts (kW) or British Thermal Units (BTU), with 1kW equating to roughly 3,412 BTU. For a standard UK bedroom of 15 square metres, a 2.5kW (9,000 BTU) unit is usually sufficient. For a larger 25 square metre living room, you should look towards a 3.5kW (12,000 BTU) system.
To calculate the specific needs of your room, you must consider the 'heat gain.' This includes the number of windows, which direction they face (south-facing rooms get significantly hotter), the type of insulation in your walls, and the number of electrical appliances in the room. A room with large west-facing glass doors will requires roughly 20% more cooling capacity than a north-facing room of the same size. Most reputable installers will use a simplified heat load calculation: multiplying the room's volume (Length x Width x Height in metres) by a factor of 40 for standard rooms or 50 for rooms with high heat gain to find the required Wattage.
Modern inverter technology, pioneered by brands like Mitsubishi Electric and Daikin, allows the compressor to vary its speed rather than simply turning on or off. This means a 3.5kW unit can 'throttle down' to 1kW when the room is near its target temperature, maintaining comfort with minimal energy use. When choosing your system, look for the SEER (Seasonal Energy Efficiency Ratio) and SCOP (Seasonal Coefficient of Performance) ratings. A SEER of 6.0 or higher is considered excellent for UK climates, ensuring that for every 1kW of electricity consumed, you get 6kW of cooling. In 2026, most mid-range units will meet these standards, providing both efficient cooling in summer and cost-effective heating in winter.
Installation Costs and Component Pricing in 2026
Budgeting for a wall-mounted air conditioning installation in 2026 requires an understanding of both hardware costs and professional labour rates. For a single-room 'split' installation, prices typically range from £1,800 to £3,200 including VAT. The hardware itself accounts for a significant portion of this: a high-quality 2.5kW Daikin or Mitsubishi Electric unit will cost between £600 and £1,100. Lower-cost alternatives from brands like Samsung or LG might sit in the £500 to £850 bracket. These prices are for the indoor and outdoor units only, excluding the necessary installation kits, which include copper piping, lagging, wall brackets, and condensate pumps.
Labour costs in the UK have seen a steady rise, and for a standard back-to-back installation—where the indoor unit is mounted on the same wall as the outdoor unit—you should expect to pay between £600 and £1,000 in labour. If the installation is more complex, requiring long pipe runs through lofts or under floorboards, labour costs can easily double. A 'multi-split' system, which connects one large outdoor condenser to two or three indoor units, typically starts at £4,500 and can reach £7,500 depending on the complexity of the pipework and the total kW output required.
Additional costs often overlooked by homeowners include the electrical supply. If your existing consumer unit is full or lacks the necessary RCD protection, an electrician may charge £250 to £500 to run a new dedicated 16-amp or 20-amp feed. Furthermore, if the indoor unit is located on an internal wall where gravity drainage is impossible, a condensate pump must be installed. These cost around £70 to £150 plus extra labour, and while they are small, they do produce a slight clicking sound when active. It is always wise to include a 10% contingency fund in your budget for unforeseen structural issues or the need for specialised scaffolding if working at significant heights.
Step-by-Step Installation Process: Physical Mounting
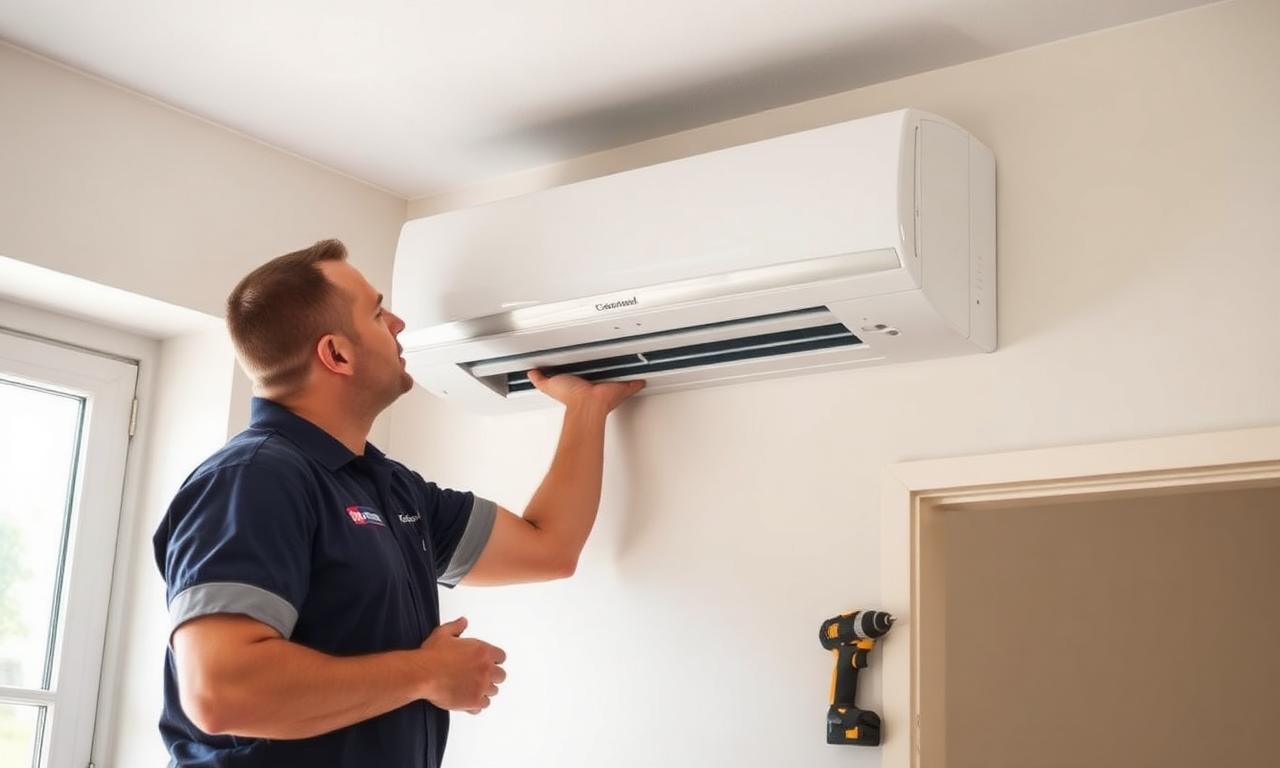
The physical installation begins with the placement of the indoor unit. In a typical UK bedroom, this is usually above a window or on the wall adjacent to a bed, at least 2.3 metres above floor level to ensure proper air distribution. The installer first secures the mounting plate to the wall using heavy-duty fixings, ensuring it is perfectly level. Any tilt in the mounting plate will prevent the condensate water from draining correctly, leading to leaks and potential water damage to your wallpaper or plaster. Once the plate is secure, a 65mm or 75mm hole is core-drilled through the external wall at a slight downward angle. This hole accommodates the refrigerant lines, the communication cable, and the drain hose.
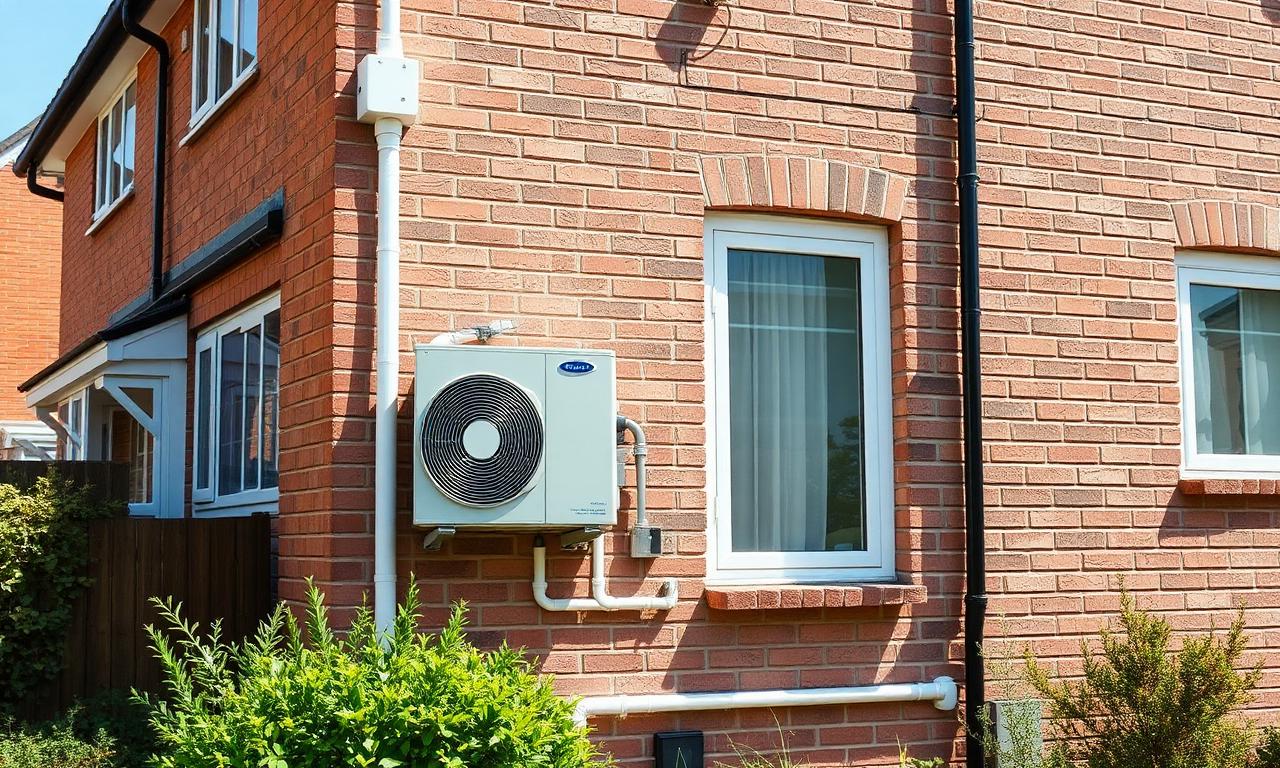
Outside, the condenser unit must be positioned on a stable surface. This is often a set of wall-mounted brackets or a pre-cast concrete slab on the ground. It is vital that the outdoor unit has at least 200mm of clearance behind it and 500mm in front to allow for adequate airflow; without this, the unit will overheat and lose efficiency. Rubber 'anti-vibration' mounts are placed between the unit and the bracket to prevent the hum of the compressor from vibrating through the house walls. In many UK terrace houses where space is at a premium, mounting the unit high on a gable end is a common solution, though this requires long ladders or towers.
Once both units are mounted, the copper refrigerant pipes are carefully bent and routed through the hole. These pipes must be insulated separately to prevent energy loss and condensation. The electrical interlink cable is then connected between the units. This cable communicates the temperature data and controls the outdoor compressor's speed. The final step of the physical mount is the 'trunking' or 'capping,' where the external pipes are hidden inside a plastic aesthetic cover to protect them from UV damage and to keep the exterior of your home looking tidy. At this stage, the system is physically in place, but the most technical part of the job—the commissioning—is yet to begin.
Commissioning, Pressure Testing, and Vacuuming
Once the physical pipes are connected, the F-Gas engineer begins the commissioning process. This starts with a pressure test. The system is filled with oxygen-free nitrogen (OFN) to a high pressure, often around 40 bar (approx 580 psi). The engineer monitors this pressure for at least 30 to 60 minutes using a digital manifold gauge. If the pressure drops, there is a leak in one of the flared joints, which must be fixed before any refrigerant is introduced. This step is non-negotiable; releasing refrigerant into the atmosphere due to a poorly made joint is a violation of environmental law and a major cause of system failure.
After a successful pressure test, the nitrogen is released, and the system undergoes 'evacuation' using a vacuum pump. This process removes all air and, more importantly, all moisture from the copper pipes. Any moisture left in the system can react with the refrigerant oil to form acids that will eventually destroy the compressor. The vacuum must be pulled down to at least 500 microns and held to ensure the system is completely dehydrated. This process can take anywhere from 30 minutes to several hours depending on the length of the pipe run and the humidity levels on the day of installation.
Only after the vacuum is confirmed is the refrigerant released. Most modern units come 'pre-charged' with enough R32 refrigerant for a pipe run of up to 5, 7, or 10 metres. If your installation exceeds this length, the engineer must calculate and add a specific 'top-up' amount of refrigerant, usually measured in grams per extra metre. Once the valves are opened, the system is powered on for the first time. The engineer will check the 'superheat' and 'subcooling' temperatures to ensure the system is operating within the manufacturer's parameters. A commissioning report is then filled out, detailing the pressures, temperatures, and the amount of refrigerant in the system, which serves as your proof of a professional installation.
Running Costs and Energy Efficiency in the UK
A common concern for UK homeowners is the impact of air conditioning on their monthly electricity bill. With the energy price cap fluctuations, efficiency is paramount. A modern A++ rated 2.5kW wall-mounted unit will typically draw between 500W and 800W of electricity when running at full capacity. However, because of the inverter technology mentioned earlier, the unit rarely runs at full capacity. Once the room reaches the target temperature, the power draw often drops to as little as 200W—roughly the same as a few old-fashioned incandescent light bulbs. Over a typical eight-hour summer night, a well-insulated bedroom might only consume 1.5kWh to 2.5kWh of electricity.
At a 2026 projected average electricity cost of 28p per kWh, running your air conditioning for a full night could cost between 42p and 70p. During a heatwave, this is a small price to pay for a restful night's sleep. Furthermore, many UK homeowners are now using their air conditioning units for heating during the shoulder months (October and April). Because these units are air-source heat pumps, they are incredibly efficient at heating. A unit can provide 4kW of heat for every 1kW of electricity consumed, making it significantly cheaper to run than a standard electric plug-in heater or even a gas boiler when only heating a single room.
To keep these running costs low, regular maintenance is essential. Homeowners should clean the mesh filters in the indoor unit every two to four weeks during periods of heavy use. Dusty filters restrict airflow, forcing the fans and compressor to work harder and increasing energy consumption by up to 15%. An annual professional service, which involves chemically cleaning the coils and checking the refrigerant levels, typically costs between £100 and £150. This investment not only keeps your bills down but also extends the lifespan of the equipment from a standard 10 years to upwards of 15 or 20 years.
Common Installation Mistakes and How to Avoid Them
Even professional installations can go wrong if shortcuts are taken. One of the most frequent mistakes is the incorrect placement of the indoor unit. If placed too close to a heat source or in a location with restricted airflow (such as tucked behind a wardrobe), the thermostat will give false readings, leading to poor performance. Another common error is failing to consider the 'lift' for the condensate water. Water flows downhill; if your pipework needs to go up into a loft, you must have a condensate pump. If this pump is of poor quality or incorrectly installed, it will be noisy and prone to failure, often resulting in water leaking down your interior walls.
Outside, the placement of the condenser is equally vital. Avoid placing it in direct, unrelenting sunlight if possible, as this makes it harder for the unit to reject heat. Also, ensure it is not placed directly on the ground where leaf litter, snow, or garden debris can clog the delicate aluminium fins. A clogged outdoor coil is a leading cause of 'high-pressure' faults, where the system shuts down to protect itself from damage. Engineers also warn against using undersized electrical cabling; using standard 1.5mm flex for a large 5kW unit can lead to overheating cables and potential fire risks.
Finally, the most significant mistake is hire-and-forget. Many homeowners choose the cheapest quote without verifying the installer's F-Gas credentials. You should always ask for the engineer's individual F-Gas number and the company's Refcom or Quidos registration. Cheap 'white-box' units found on auction sites often lack spare parts support in the UK. Sticking to established brands like Panasonic, LG, or Samsung ensures that if a PCB (printed circuit board) or a sensor fails in five years, you can actually source the replacement part. Investing slightly more upfront in a reputable brand and a certified installer will ultimately save you hundreds of pounds in repairs and energy waste.
Choosing the Right Installer and Getting a Quote
When you are ready to proceed, getting at least three different quotes is standard practice. A reputable installer should offer a free site survey, either in person or via a detailed video call, to assess your room size and electrical situation. Beware of any company that gives a firm price over the phone without seeing the layout of your home. During the survey, ask about the 'COP' and 'EER' ratings of the units they propose, and enquire about the length of the labour warranty. While manufacturers like Daikin often offer 5 to 7-year warranties on the parts, the installer's warranty on the pipework and joints is usually only 1 year.
Check online reviews specifically for 'domestic air conditioning' rather than commercial refrigeration. A company that spends its days working on large supermarket chillers may not have the finesse and tidiness required for a high-end residential living room. Look for installers who are 'Approved Installers' for specific brands; for instance, a Mitsubishi Electric Accredited Installer can often offer extended warranties that aren't available to general tradespeople. This certification also proves the engineer has undergone specific training on that brand's latest technology and diagnostic tools.
Before the work begins, ensure you have a written contract that specifies the exact model numbers of the units being installed. It should also detail who is responsible for the electrical work and the disposal of any old units (in accordance with WEEE regulations). In the UK, professional installers will be familiar with the 'Construction (Design and Management) Regulations 2015' (CDM 2015), ensuring the site is safe during the build. A good installer will also take the time to show you how to use the remote control and how to set up the Wi-Fi app, which is now standard on most units from manufacturers like Samsung and LG, allowing you to pre-cool your home before you arrive.
Frequently asked questions
Can I install a wall-mounted air conditioner myself in the UK?+
You can physically mount the units and drill the holes, but you cannot legally connect the refrigerant pipes or commission the system. UK F-Gas regulations require a certified engineer to handle the gas. Doing it yourself voids your warranty and risks a heavy fine.
How much does it cost to run air conditioning in 2026?+
Based on 2026 energy prices, a 2.5kW A++ rated unit costs roughly 8p to 12p per hour to run once the room is cooled. For a typical 8-hour night's sleep, this equates to around 60p, depending on your insulation and outdoor temperatures.
Do I need planning permission for the outdoor unit?+
Usually, no. Most domestic installations are 'Permitted Development.' However, rules apply regarding the unit's size, its distance from the neighbour's boundary (often 1 metre), and noise levels. Residents in listed buildings or conservation areas must always consult their local council first.
How long does a typical installation take?+
A standard 'back-to-back' installation for a single room usually takes between 4 and 6 hours. More complex installations involving long pipe runs, condensate pumps, or multi-split systems can take one to two full days.
Which are the best air conditioning brands for UK homes?+
Daikin and Mitsubishi Electric are generally considered the gold standard for reliability and efficiency. Panasonic and LG offer excellent mid-range options with great smart features, while Samsung is popular for its 'WindFree' technology that eliminates cold draughts.
What is a 'back-to-back' installation?+
This is the simplest and cheapest installation method. The indoor unit is mounted on an external wall, and the outdoor unit is placed directly behind it on the outside. This minimises pipe length (usually under 3-5 metres) and labour time.
Does air conditioning provide heating as well?+
Yes, modern UK split systems are 'air-source heat pumps.' They are highly efficient at heating, often 300-400% efficient, making them an excellent way to heat a single room without turning on the whole central heating system.